For a long time, I wanted to build some toy that will essentially point at the moon.
Well, I also wanted this to be the precursor of a project to bounce radio of the moon and talk to other radio enthusiasts this way. But this involves, among other things:
This will all take time - more than I have right now.
But, the moon pointer I can do now – it’s relatively easy, requires not too many weird parts, yet the experience will be instructive.
We’ll learn
to program an ESP32 micro-controller
to play with servos or stepper motors
to play with astronavigational code (more about that later)
We will also gain some experience doing real world robotics stuff: the moon pointer could be running nonstop (on solar) unsupervised for a long time, so proper engineering discipline is required.
So the initial design for the MVP moon pointer is:
use ESP32 as the microprocessor (MCU) using micropython. This MCU is dirt cheap (developer boards for around $5 including Wifi connectivity). It has more than enough oomph to run a high level programming environment, micropython, which is easy to use, has great libraries and I’m fairly familiar with python. I initially played around with an ESP8266, which also supports micropython. The ESP8266 does however only come with single precision floating points, which does not work well for astronomical code. It’s relatively easy to compile micropython with double precision for ESP32.
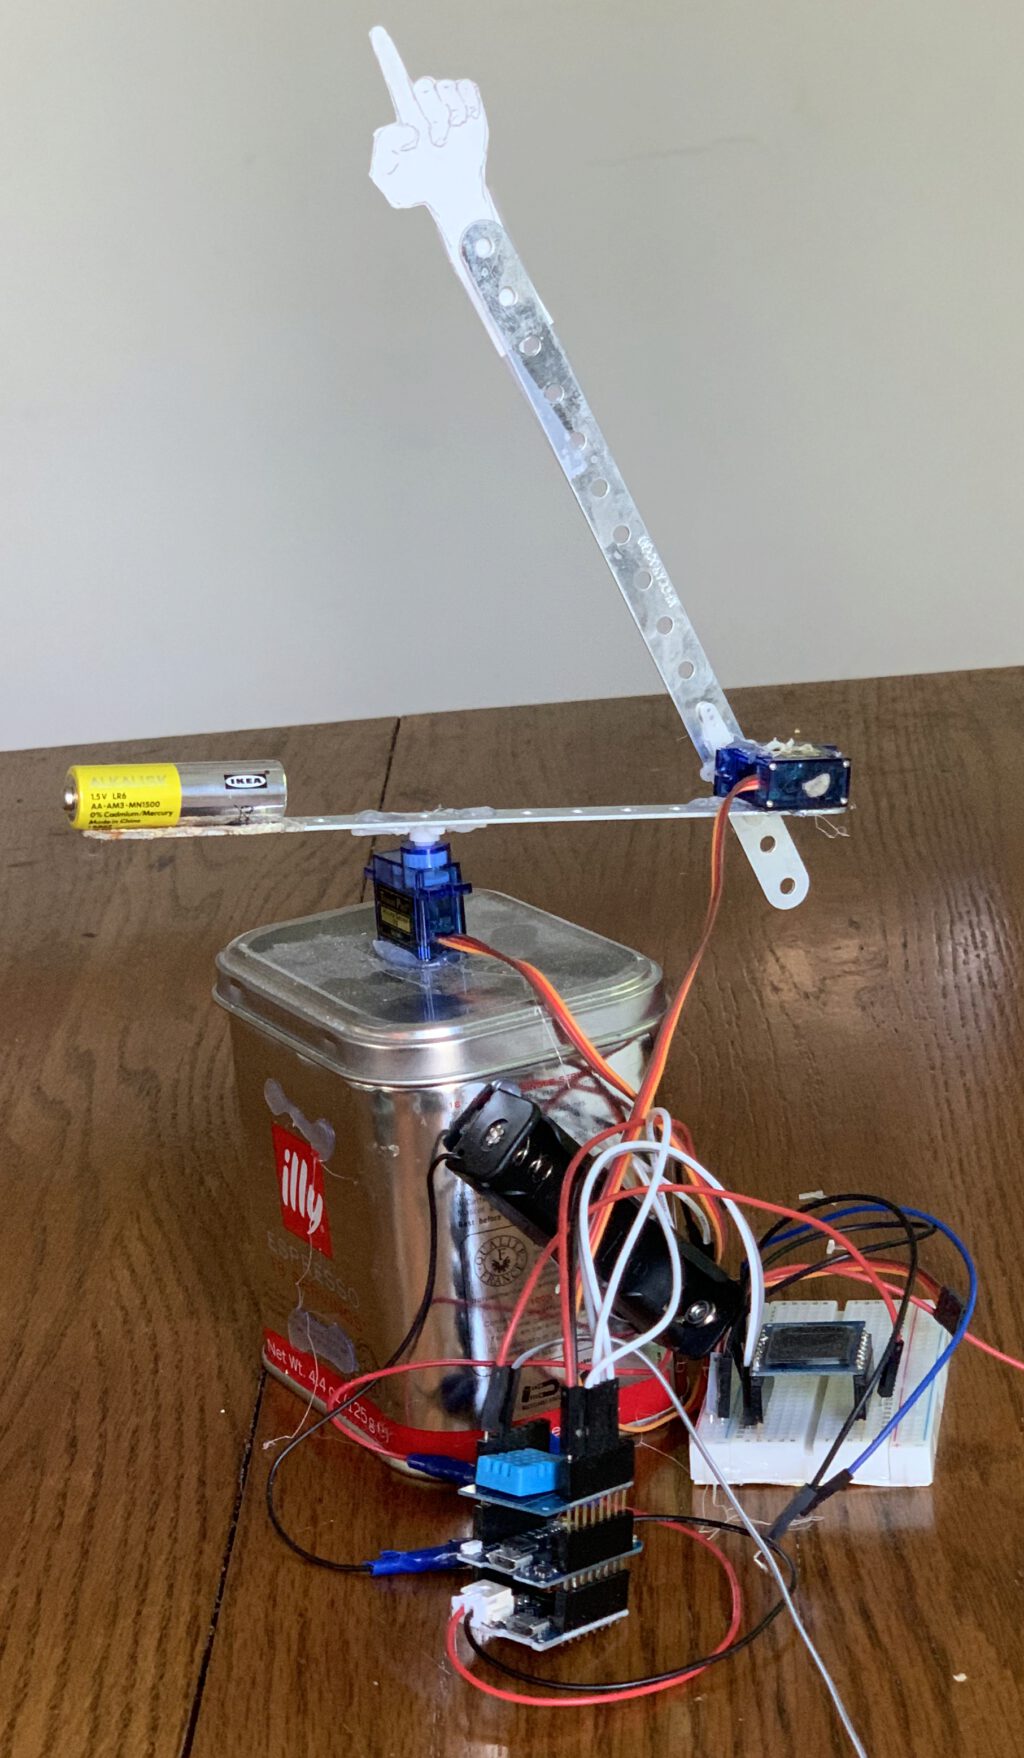
Use Servos for v1. I really only need to point at the moon and do not have to handle any load. I will use 2 180 degree servos, which makes programming a bit more tricky – the azimuth needs to go between -180 degree to +180 degree, so I need to use both sides of the elevation arm as the “pointer”. More about that later. In v2, I plan to use stepper motors and build something that will be able to hold a lightweight 2m\70cm antenna in non-windy conditions. Stepper motors will also allow for a much nicer looking pointer, but I’ll have to worry more about cable layout, stop positions etc.
Here is an early prototype of my servos setup:
I’ll post occasional progress reports. Use the comments to ask questions or prod me. You can find the code at github: mooncalc, moontracker.
In part two, I’ll talk about how to get started with micropython on ESP32.
please follow these instructions to build your own moon pointer:
Build the hardware as described in part three.
Set up your ESP32 environment as described in part two, especially install ampy.
upload those libraries:
%
% ampy -p /dev/tty.SLAB_USBtoUART put tm1638.py%
% ampy -p /dev/tty.SLAB_USBtoUART put microppyGPS.py%
% ampy -p /dev/tty.SLAB_USBtoUART put mooncalc.pymoontracker mqodule on Github, install as main.py
       %
% ampy -p /dev/tty.SLAB_USBtoUART put moontracker.py main.py
Plug in and bask, secure in the knowledge of where the moon is at any time.
Written on July 16, 2020
